Tuesday, May 31, 2011

Palella

It's Summer!!! Officially, and I have the sun burn to prove it. Do your eating habbits change in the summer? Mine definitely do. Something about the warm weather, makes me want to switch up everything I eat. So while all winter long, when I needed that saffron fix, I made risotto, now it's Palella time! Now that I have a grill, I would like to figure out how to grill this (because what doesn't taste better on the gril?!), but in the mean time, here is a quick palella that you can make in the oven and tastes just like your on the beach in Spain!


Palella:
2 chorizo style sausage links, raw
2 tbsp olive oil, divided
3 boneless skinless chicken thighs
1/2 vidalia onion
1 bell pepper
1 garlic clove
2 cups of rice, medium grain
4 cups of chicken stock
1/2 tsp of paprika
1 tsp saffron
1 tbsp sherry vinegar
1 bay leaf
1 medium tomato
1 can of artichokes, drained and washed
1 lb of mussels
1 lb of shrimp, peeled and deveined
Salt, pepper

Pre-heat the oven to 400 degrees and position rack in the center. Grease a stone or metal baking dish with 1 tablespoon of olive oil, and put in oven while pre-heating. Heat a large skillet over medium-high heat. Slice the chorizo into 1/2 inch slices and put in the pan. Cook until edges are charred and the chorizo is fragrant, about 2 minutes, set chorizo asside. Add remaining olive oil to the pan. Cut chicken into small chunks and season with salt and pepper. Add to the hot pan and brown on all sides. Lower heat to medium. Dice the onion, garlic, and pepper and add to the pan and cook until onions soften slightly, about 3 minutes. Add rice to the pan and "toast" until slightly opaque, about two minutes. Add stock, paprika, saffron, and sherry vinegar and stir. Pour the contents of the pan into the prepared baking dish. Cook for 15 minutes. Dice tomato, and cut the artichokes in half. Add the tomato, reserved chorizo, artichokes to palella, and gently stir to combine, trying not to disturb the very bottom layer of rice (so a crust forms). Cook until the all the stock is absoarbed, about 10 minutes longer. Season the shrimp with salt and pepper and add to the pan. Add mussels to the palella as well. Cook until the shrimp turn pink and the mussels open, about 3-4 minutes. Enjoy! (adapted from epicurious)


Happy Eating.


StumbleUpon

Friday, May 27, 2011

Malted Chocolate Chip Ice Cream Sandwiches

The long weekend is here! Hooray! And the official start of summer. I am looking forward to a long, hot summer, full of weekends at the Jersey Shore, wearing white, and summerizing my desserts. These cookies, plain, are hands down 100% the best chocolate chip cookie I have ever tasted. I seriously had trouble sharing them, which is very unusual for me (I am usually a feeder). The malt powder is like magic, there is no other way to describe these cookies besides malty magical amazingness. Then, if that is not insane enough for you, we can spread some delicious french vanilla ice cream inbetween, and make the most delicious icecream sandwich ever. So, if your still not sure what to bring to your weekend BBQs, trust me, and make a batch these amazing ice cream sandwiches.


Malted Chocolate Chip Cookies:
2 sticks of butter, softened
3/4 cups of brown sugar
3/4 cups of white sugar
2 eggs
1 tsp of vanilla extract
1 1/4 tsp baking soda
1 tsp salt
1/2 tsp coarse sea salt
1/2 cup plus 1 tbsp malted milk powder
2 cups of flour
12 oz of semi sweet chocolate chips

Preheat the oven to 375 degrees, place a rack in the upper and lower thirds of the oven. Cream together butter and both sugars until smooth and fluffy. Add eggs one at a time, mix until incorporated. Add in vanilla and mix in. Add baking soda, salts, and malted milk powder, and mix until just combined. Add 1 cup of flour and mix until just combined, repeat with remaining cup of flour. Fold in chocolate chips. Line 2 baking sheets with parchment paper. Drop cookies by rounded teaspoons, giving them ample room to spread out (12 cookies per sheet). Bake until golden brown, 10-12 minutes; for best results cookies should spend no more than 1/4 of the baking time (about 3 minutes) on the bottom rack. I started the cookies on the bottom, towards the end of the previous dozens baking time, and then moved them to the top rack as soon as the other cookies were done. Makes about 4 dozen cookies. (adapted from the Pioneer Woman)


To Make Ice Cream Sandwiches:
Malted chocolate chip cookies
French vanilla ice cream
Mini chocolate chips, or mini chocolate chunks

Let ice cream stand at room temperature for about 5 minutes to soften slightly. Pair the desired number of cookies by size. On one cookie, spoon about 1/4 cup (you can eyeball) of ice cream, and spread it fairly evenly. Press second cookie on top, until ice cream expands almost to the edge of the cookie. Run a knife or your finger around the ice cream to smooth. Sprinkle with mini chocolate chuncks, repeat with remaining cookies. Wrap the assembled sandwiches in wax paper and freeze until firm, at least 30 minutes. Enjoy!


Happy Eating.


StumbleUpon

Wednesday, May 25, 2011

Classic Gazpacho

Ahh Summer. Well not quite yet, but the weather and produce is making a turn for the warmer. In Whole Foods this week (I am a Whole Foods gal now, because my move put me a touch too far from my beloved Wegmans), I found cherries, apricots, and beautiful tomatoes. They may not be Jerseys yet, but they were so delicious, they just had to become my absolute favorite tomato dish. When I lived (lived being the loose term applied to the summers I spent there) in Spain, particularly Madrid, I ate Gazpacho every single day. I could not get enough, and I never got sick of it. I would have it for lunch, or stop on my walk home from class. I loved the cool and refreshing soup, and the little plate of mix ins it came with. Making this made me so happy, and eating it out on my deck this weekend brought me right back to my favorite little neighborhood joint in Madrid, where I would sit outside, enjoy the weather, the company of good friends, and a delicious bowl of cool, refreshing Gazpacho.


Classic Gazpacho:
2 inch long piece of baguette, without the crust
2 garlic cloves
1 1/2 tsp salt
2 tbsp of Sherry vinegar
1 tsp of sugar
2 1/2 lb of tomatoes
1/2 red bell pepper
1/2 jalapeno
1/2 cucumber
1/4 vidalia onion

Fixings:
1/2 a tomato
1/2 cucumber
1/2 bell pepper
1/4 vidalia onion
1/2 lime
2 inch piece of baguette

In a food processor, minch the garlic and salt together. Soak the bread in a some water for 1 minute, then ring out as much water as you can and add to the food processor. Core and quarter the tomatoes, peel the cucumber, and remove the seeds and ribs from the bell pepper Add in sherry, sugar, half of the tomatoes, the peppers, cucumber and onion. Blend until no large pieces remain, while the motor is running, and the rest of the tomatoes, until everything is liquified and combined. Taste and adjust seasonings. Pass soup through a strainer into a large bowl. Reserve the solids. Cover the gazpacho and refrigerate for at least 2 hours, up to overnight. Serve with the fixings: dice the tomato, cucumber, pepper, and onion into small squares. Slice the lime into thin wedges. Slice the baguette like you are making bruscetta (into thin strips). Toast the bread and then cube that as well. To serve your soup (in the classic Spanish fashion), serve the gazpacho plain, with the fixings on the side and let people stir in their own amounts of each to the soup before eating. Use reserved solids to make pan con tomate (see below).


You could discard the solids, but it's much tastier and less wasteful use them for pan con tomate (a favorite treat of mine from my time in Barcelona). It's like a Spanish version of a extra garlicy bruscetta. Slice 2 inch pieces of baguette and then cut those in half. Toast them lightly, then rub them with a garlic clove that has been cut in half. Drizzle the toast with extra virgin olive oil and top with the reserved tomato solids from the soup.


Happy Eating.


StumbleUpon

Monday, May 23, 2011

Brown Sugar Blueberry Muffins

Happy Monday everyone! I both love and hate Mondays. On the one hand, to me it's always felt like the begining of the week. It's a chance to start over, and have a great week, erase whatever went wrong last week. But, on the other hand, it means the lovely and relaxing weekend is over. Either way, Monday morning sure looks brighter with a deliciously cinnamony blueberry muffin, especially when it has a streusel topping. Muffins are fantastic because it is a socially acceptable way to have dessert for breakfast. Tell someone your having cookies for breakfast, they look at you like your crazy, but a muffin, totally fine. So whip up a batch for breakfast this week!


Brown Sugar Blueberry Muffins
Muffins:
6 tbsp butter, melted
3/4 cup of brown sugar
1/4 cup of white sugar
1/4 cup milk
1/4 cup evaporated milk
1 large egg
1 1/2 cups flour
1 1/2 tsps baking powder
1/2 tsp cinnamon
1/2 tsp nutmeg
1/2 tsp salt
2 cups blueberries

Topping:
3 tbsp butter, melted
1/4 cup of rolled oats
1/4 cup of flour
3 tbsp brown sugar
1 tbsp white sugar
1/2 tsp cinnamon
1/2 tsp nutmeg
1/4 tsp salt

Pre-heat the oven to 375 with a rack postinioned in the middle. Make the topping: Mix together the oats, flour, sugars, and spices. Pour melted butter over the mixture and stir until topping is clumpy and combined, set asside. Make the muffins: In a large bowl mix together the butter and sugars until well combined and smooth. Add milks and egg and mix until just combined. Add in baking powder spices and 1/2 cup of flour and mix until just combined. Add remaining flour and repeat. Gently fold in blueberries. Line a 12 muffin pan with liners and spray with non-stick. Divide the batter evenly amonst the muffins, each should be full to about the top of the liner. Top each with the topping, dividing it evenly amonst the muffins. Bake until a toothpick inserted in the center comes out clean, about 25 minutes. (adapted from epicurious)

Happy Eating.


StumbleUpon

Friday, May 20, 2011

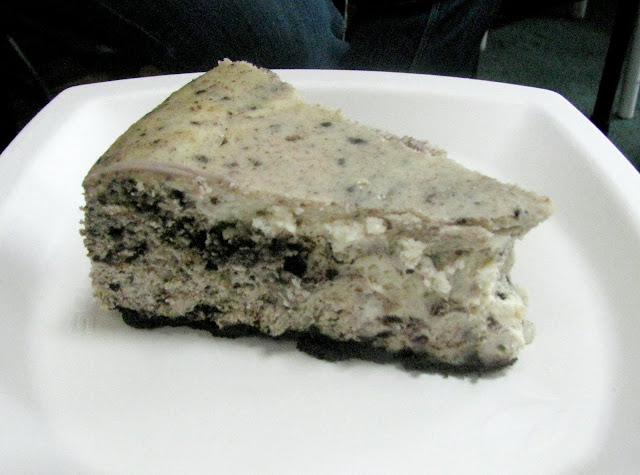
Oreo Cheesecake

I don't like to addmit it, but I really like oreos. They are completely the opposite of homemade, they are probably as packaged and mass produced as a cookie could be, but there is something so delicious about them anyways. The crisp chocolate cookie, the undentifiable cream substance, yum. So what's better than just eating oreos? Disguising there un-homemadeness by baking them into something! (like stuffed inside giant chocolate chip cookies). Or Swiriled into an already amazingly decadant cheesecake, taking it to the most insane and wonderful next level. Enjoy!


Oreo Cheesecake:
35 Oreos, divided (1 regular package has more than enough)
4 tbsp of butter, melted
1/2 tsp of salt
3 lbs (6 packages) of cream cheese, room temperature
2 cups of sugar
1/2 cup of flour
8 oz of Mascarpone cheese
2 tsp of vanilla extract
5 eggs

Pre-heat the oven to 350 degrees and position a rack in the lower third of the oven. In a food processor, blend 20 oreos until all crumbs, with no big chuncks. Add melted butter and salt, process until combined. Grease a 10 inch springform pan. Press the oreo mixture into the bottom of the pan to create the crust. Bake until fragrant and crisp, about 10 minutes. Let crust cool completely. Make the filling: In a large bowl, beat the cream cheese with a mixer on medium speed until fluffy, about 3 minutes. Gradually add sugar and flour, while mixing on low. Add Mascarpone and vanilla and mix until smooth. Add the eggs, one at a time, mixing until just combined. In the food processor, pulse remaining oreos until the cookies are crumbs and small chunks only. Stir oreos into cheese cake. Pour batter into the cooled crust/pan. Place pan on a high rimmed baking sheet. Place in the oven, and fill the pan with boiling water. Bake for 40 minutes, then reduce temperature to 325. Bake until set around the edges and slightly wobbly in the center. Turn oven off and leave the door cracked, let the cake cool in the oven for about an hour before removing. Let cake finish cooling on the counter, and then refridgerate overnight. Run a knife around the edges of the pan before releasing the spring.


Happy Eating.


StumbleUpon

Wednesday, May 18, 2011

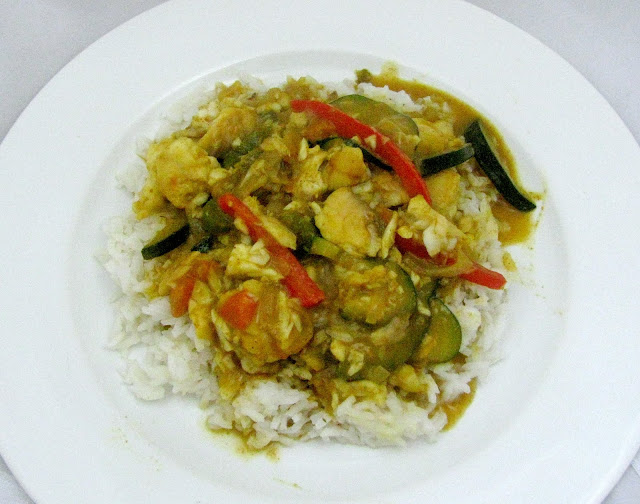
Cheater's Fish Curry

Is anyone feeling a little adventerous today? Like they might want to challenge themselves, to try something new and exciting? I love Indian Food, it has wonderful textures and flavors, and the smell of spices is just intoxicating. It's definitely outside my cooking comfort zone, and some of the ingredients (ok, a lot of them) are a bit difficult to find. So I found what I could and then improvised the rest, combining several curry recipes, and just making some stuff up as I went along. Still not adventurous enough for you? Let's through is some fish, and even though I love fish, it defenitely has a reputation for being one of the "scarier" proteins. The results of this experiment left me feeling like a mad scientist, in the best possible way, and the results were absolutely delicious. Delicate poached fish, infused with the wonderful spices of India, and in a lovely rich sauce, with just a hint of coconut and sweetness. So be a little adventerous and enjoy!


Cheater's Fish Curry:
1 tbsp extra vigrin coconut oil
3 shallots
1 onion
1 jalapeno
1 zucchini
1 bell pepper
1 tomato
2 cups of low sodium chicken stock, divided
1/4 cup plus 2 tbsp of evaporated milk
1 1/4 tsp of curry powder
1/2 tsp chili powder
1/2 tsp of salt
1/2 tsp corriander
1/2 tsp garam masala
1 tbsp of brown sugar
1 lb of tilapia
1 tbsp of corn starch

In a large skillet over medium-high heat, melt the coconut oil. Thinly slice shallots, onions, and jalapeno and add to hot skillet. Cook, stirring occasionally until shallots and onions soften and start to brown, about 6 minutes. Slice zucchini and bell pepper and add to pan, lower heat to medium and cook until pepper begins to soften, about 3 minutes. Chop and add tomato. Add 1 cup of stock and 1/4 cup of evaporated milk. Add the spices and sugar, stir to combine. Bring to a boil and reduce to a simmer. Season fish with salt and chop into 1 inch pieces, and add to the skillet. Cook, stirring frequently until the fish is opaque, about 5 minutes. In the meantime, whisk the cornstarch, remaining stock, and remaining evaporated milk together in a bowl. When the fish is cooked through, whisk in the stock mixture, and stir until the sauce thickens, about 1 minute. Adjust seasonings to taste and serve over rice. Enjoy.

Happy Eating


StumbleUpon

Monday, May 16, 2011

Classic Chocolate Chip Cookies

What, in this world is more perfect than a chocolate chip cookie? It may not be original, but they are absolutely, 100% my favorite cookie, and quite possibly my favorite baked good. It may be a cliche or a bit sad considering the endless things there are to bake, but sometimes, nothing beats the a classic, and nothing is more classic than a chocolate chip cookie. Normally, I am all about the super thin, crisp, and buttery cookie. After chatting with my consultants (thanks to those of you who I harassed about your cookie preferences), I decided to mix it up and go for something a little thicker, with crispy, crumbly edges and and chewy center. That seemed to be the holy grail of the chocolate chip cookies. And while there is always room for improvent (and much fun to be had in the kitchen) these cookies are absolutely AMAZING, and have totally converted me from my thin and crispy ways.


Classic Chocolate Chip Cookies:
2 1/2 sticks of butter, room temperature
1 1/2 cups of dark brown sugar
1 cup of white sugar
2 eggs
1 tsp of vanilla extract
3 1/2 cups of flour
3/4 tsp of salt
1 tsp of corse sea salt
1 1/4 tsp baking soda
1 1/4 tsp of baking powder
12 oz of chocolate chips

In a large bowl (or the bowl of a stand mixer), mix the butter and both sugars. Mix on medium speed until smooth and fluffy about 4 minutes. Add in eggs and vanilla and mix until combined. Add 1 cup of flour, both salts, baking soda and powder. Mix until just combined. Add another cup of clour and mix until just combined. Add remaining flour (1 1/2 cups) and mix in. Stir in chocolate chips. Line a baking sheet with partchment paper and drop cookies by rounded spoonful onto the sheet. Just get all of the cookies on the sheet, don't worry about spacing. I had about 4 dozen good sized cookies. Chill the dough for at least an hour, up to overnight. Pre-heat the oven to 350, with a rack positioned in the middle of the oven. Butter or pam another baking sheet lined with partchment. Space 12 cookies on the sheet and bake until golden, about 16-18 minutes. Repeat until all the cookies are baked, keeping the unbaked dough in the fridge until ready to use. Serve with a glass of milk. (adapted from Martha)

Happy Eating.


StumbleUpon

Friday, May 13, 2011

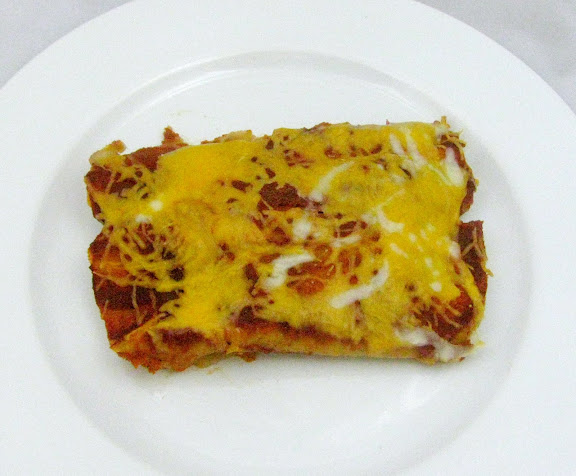
Turkey Enchiladas

I love Mexican food, and since Cinco de Mayo was right in the middle of my moving process, I've decided to celibrate a bit late, with an easy Cassorale, known as Enchiladas. I usually go for more of the crispy things, I usually pick hard taco shells, I'll take nachos over quesadillas any day. So I have always been a little wary of enchiladas, they are definitely in the soft family. However, they are amazing. The corn tortillas really absoarb the sauce and transform into the soft and delicious crust type thing, it's magical. I could just eat that part, but then you throw in cheese, meat, and sauteed veggies. Yum! I can't believe I ever had an aversion to this, I really need to expand my textural horizons, I wonder what else I have been missing? The recipe may seem a little long and complicated, but it's really very easy and comes together quickly, you could also use store bought enchilada sauce to save yourself some time.


Turkey Enchiladas:
For the sauce:
8 oz of canned tomato sauce, plain
2 tbsp of tomato paste
1 1/4 tsp of chili powder
1 1/2 tsp of cumin
1/2 tsp of paprika
1/2 tsp of onion powder
1/4 tsp celery salt (or regular salt)
1/4 tsp of pepper

For the filling:
1/2 lb of ground turkey breast meat
1 medium yellow onion
1 poblano pepper
1/2 bell pepper
1/2 tsp chili powder
1/2 tsp of cumin
1/2 tsp of paprika
1/2 tsp of pepper
1/2 tsp of salt
1/4 cup of chicken stock, low sodium

For assembley:
8 whole corn toritillas, small sized
1/2 cup of 2% cheddar cheese, sharp
1/2 cup of 2% Mexican blend cheese, divided

To make the sauce bring the tomato sauce and paste to a simmer, stir until the paste is disolved into sauce, add seasonings and cook covered for about 5 minutes. Cool and refridgerate until ready to use. (can be made up to a few days in advance, I made mine in the morning for dinner that night).

Pre-heat the oven to 375 degrees. Heat a large non-stick skillet over medium-high heat, add the turkey meat in a big clump to brown. Dice the onion and peppers. Using a wooden spoon, brake up the meat in the pan, add the onions and peppers and stir everything together. Lower heat to medium-low. Add in the spices and stir so everything is coated. When turkey starts to stick, add chicken stock and stir. When the stock has been absoarbed, remove from heat. Coat the bottom of a small casserole dish with about 1/3 of the enchilada sauce. Warm the tortillas in a microwave (or under hot water, or in the oven carefully) until they soften. Spread them out, and fill each one with 1/8 of the meat mixture (doing them all at once ensures all the meat gets used and evenness). Top the meat with a small spoonfull of sauce. Take 1/4 cup of the Mexican cheese and divide it between the enchiladas. One at a time roll each one, and place in the casserole dish seem side down (don't worry is a little escapes). Repeat until they are all gone, and the dish is full. Pour the remaining sauce evenly over the enchiladas, bake for 20 minutes, then top with the cheddar and remaining Mexican cheese. Return to the oven, turn on the broiler. Broil until the cheese melts, about 1 minute. Enjoy!

I almost forgot to mention, but this adaptation is also very healthy. They were so tasty and tasted so sinful, I almost forgot they were also healthy and a very reasonable low calorie dinner option (with some portion control of course).

Nutrition Info:
Serving Size: 2 Enchiladas
313 Calories, 8g fat, 24g protein, 35g carbs, 4g fiber

Happy Eating


StumbleUpon

Wednesday, May 11, 2011

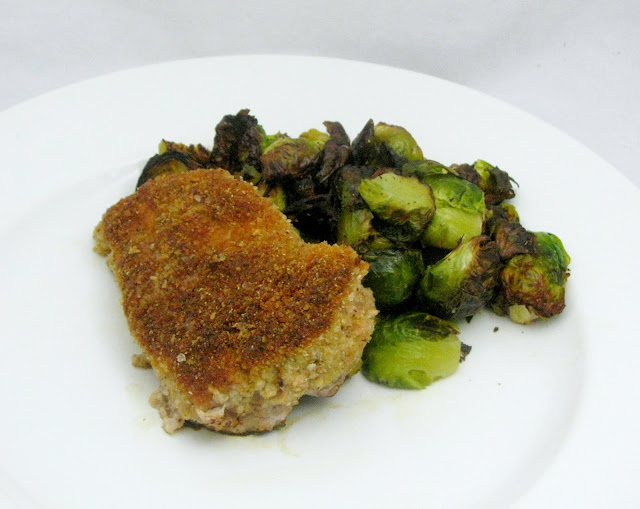
Golden Pork Cutlets

I'm back!!! You might be wondering where I went, since I have still been with all of you. Well, I haven't gone anywhere fancy, but I did move to a new house, and due to some utility related complications (no gas, and a gas oven) I hadn't cooked or baked anything in 5 days (I think that might be a record). But, all is fixed, and I'm delighted to be back in the kitchen. I missed it, a lot. I was so happy standing at my new oven last night, mostly because I was delighted to be cooking, but also because my new oven is so much easier to clean than the old one (that's me thinking ahead to after dinner) and because it has a griddle pan in the center, which I obviously had to use immedietely. I am dreaming of pancake weekends, but until then, delicious dinners. So what did I make my first night back in action? Nothing to difficult (you have to ease back into it), but it had to be delectable and fun, it also had to use up the limited supplies I had left (don't worry, I have since replenished). So I decided to bread up some pork chops, healthy style (summer is a round the corner), and bake some of my mom's amazing brussels sprouts (sea salt, pepper, olive oil, bake at 425 until charred and delicious, about 20 minutes, how's that for an easy recipe?). I am so happy to be back in the kitchen, and happy to report that these pork chops were prounced amazing by the boyfriend (who I didn't mention the healthy thing too), he ate three and didn't want to share the last bite. Enjoy!


Pork Cutlets:
2 boneless, center cut pork chops
1/4 cup of whole wheat flour
1/4 cup of liquid egg whites (or 3 egg whites, or 1 egg)
1/2 cup of bread crumbs
1/2 tsp of chili powder
1/2 tsp of salt
1 tsp of pepper
1/2 tsp of paprika
1/2 tsp of onion powder
1 tbsp of sunflower oil (or canola or vegetable)

Pound the pork chops with a meat mallet until they are about 1/4 inch thick. Cut them down the center so you have 4 roughly equal chops. Scoop the flour onto a small plate. Pour the egg whites into a bowl and beat lightly. Add the bread crumbs to another bowl. In a small bowl mix together all of the spices. Divide the mixture evenly between the flour and the bread crumbs and stir each to combine. Heat a grill/griddle pan or a large skillet with the oil over medium-high heat. To bread the chops, place two chops at a time in the flour, then flip to coat the other side. Submerge them in the egg mixture on both sides, then transfer them to the bread crumbs, make sure the chops are fully coated with bread crumbs before transfering to the pan. Repeat with the remaining chops. Cook until golden brown on one side, about 4 minutes, then flip and cook for an additional 3-4 minutes, until both sides are brown and pork chops are cooked through. Adjust the temperature as necessary to prevent burning.

Happy Eating.


StumbleUpon

Monday, May 9, 2011

Beeriyaki Stir Fry

I don't know what it is about summer, but it just makes me want beer, to drink and to cook with. This delicious concoction is a mixture of beer brats and a shrimp stir fry, and it is suprising and delicious. This fun combination is a great easy week night dish. You may have noticed that I have been a little shrimp happy lately, and that is because I made an awesome supermarket discovery, the un-peeled un-deviened non-frozen shrimp that I used to buy (and peel and devein myself) are the same price as the frozen, peeled and deveined shrimp. Amazing! So much easier (and less work) to un-thaw, than to peel and devein. So let the shrimp-a-poluzza continue.


Beeriyaki Shrimp and Sausage:
1/2 lb of shrimp
1 pork sausage (big link)
1/2 bottle of beer
1 tbsp of sriracha
2 tbsp of lime juice
1 bell pepper
1 cup of broccoli, chopped
1 cup of sugar snap peas
1/2 jalapeno
2 tbsp of teryaki sauce
2 tsp of cornstarch
1/4 cup of panko bread crumbs
Canola oil for cooking
salt, pepper
Rice for serving

In a medium sized bowl mix the beer, Sriracha, and lime juice. Season lightly with salt and pepper, add shrimp and refridgerate for about 20 minutes. Heat a large skillet over medium-high heat and add sausage to brown. Remove sausage from pan (does not need to be cooked through), and set asside. Coat the bottom of the pan in oil. Chop pepper, broccoli and add to the pan. Add snap peas whole to the pan. Mince jalapeno and add to the pan. Cook, stirring occasionally until vegetables are browning slightly, then reduce heat to medium low. Chop the seared sausage as small as you can and add to the veggies. Drizzle the mixture with the teryaki sauce and stir to combine. Add the shrimp, reserving the marinade. While the shirmp are cooking, whisk the cornstarch into the marinade. Add to the pan and turn heat to high, bring everything to a boil and stir until the sauce thickens. Remove from heat and stir in the panko, season with salt and pepper to taste. Serve with rice.

Happy Eating.


StumbleUpon

Wednesday, May 4, 2011

Banana Mango Smoothies

When people first see my blog, they often ask how I don't weigh 300 lbs, my dad in fact asks me this once a week. Whenever I get this question I first remind them that there are loads of healthy recipes on here, and that second I don't eat like this everyday. I am not shoveling cinnamon buns in my mouth for breakfast everyday, or having cream sauce pastas for dinner followed by huge slices of cake for dessert. I generally eat very healthy, and when I do splurge, it's on something extremely worth while, whether I made it or it comes from a restaurant, I better love every bite. And remember, only the best of my best makes it here, to you. So, why I am I telling you all this? Well because I wanted to share my new favorite everyday creation with you. I have had this delicious smoothie 3 times this week and I am still dreaming of another one. As many of you know, I have a love affair with breakfast. It is absolutely my favorite meal of the day, and I never ever skip it, I don't think I am capable. When the weekend comes I enjoy my healthy stuffed French toast and egg dishes (or the occasional pancake), during the week I need something fast, healthy, and filling to help me start my day. In the winter, I am very much an oatmeal kind of gal, but during these lovely warmer months, I like to keep a stockpile of fresh and frozen fruit on hand to whip up delicious smoothies.


Banana Mango Smoothie (makes 1 large smoothie):
1/2 banana, frozen
1/2 cup of mango, chopped
1 cup of milk or unsweetened milk substitute (I like almond breeze)
1/4 cup of rolled oats, quick or regular
2 tbsp of sliced almonds
1/2 tsp of vanilla extract
1/2 tsp of cinnamon
Ice cubes, to taste (optional)

Blend together the banana, mango and milk. Check consistency and add ice to desired thickness (I usually toss in 2 or 3 to bulk it up a bit, blend until smooth. Add oats, almonds, vanilla, and cinnamon. Blend until everything is incorporated. Pour into a tall glass and enjoy.

Well now you have seen a delicious example of how I eat on a daily basis. Leave some love below if you enjoyed this insight into my everyday food, I am thinking of adding a feature on some of my healthy, delicious, fast, and make ahead breakfasts and lunches and I'd love to hear what my lovely readers think. And as always...

Happy Eating.


StumbleUpon

Monday, May 2, 2011

Sriracha Lime Shrimp

I love a meal that I can make super fast. Sometimes (believe it or not) I don't feel like cooking and I jsut want something delicious to be done already. I love a meal that I can throw a couple of things in a bag, go change, come back and cook it it about 10 minutes. It's good to have a few of those in your back pocket for lazy days or days you are so hungry you can't wait for dinner to be done. This shrimp meal is delicious, healthy and super fast. Just serve up the shrimp with sauteed veggies and chinese noodles (which cook in three minutes, so perfect for a fast meal). Or if you can't wait for the onions to soften, toss the shrimp and noodles with some lettuce and additional lime, and spritz of olive oil for a fast and delicious salad.


Sriracha Lime Shrimp:
1 tbsp of Sriracha Sauce
1 lime, juiced and zested
1 lb of shrimp, peeled and deveined
1/4 tsp of salt
1/2 tsp of pepper
1 tsp fresh ginger, grated
1/2 cup of vegetable stock or 1 tbps of canola oil for cooking

Place peeled and deveined shrimp in a plastic bag. Stir together the Sriracha, lime juice, sal, pepper, and ginger. Add to the shrimp. Let marinade for 30 minutes to an hour. Heat a skillet over medium-high heat. Add vegetable stock (to boil) or oil (to pan fry). When skillet is hot, add shrimp and cook stirring frequently until they are cooked through, about 4 minutes. Serve with chinese noodles and sauteed vegetables (I used a pepper-onion-mushroom medley). Enjoy.

Happy Eating.


StumbleUpon